Cameyo integrates with G Suite and Google functions at different levels:
Authentication
You can configure users to authenticate using their Google credentials, through Google OAuth2 SSO (single-sign-on).
To activate this authentication method, go to online.cameyo.com/company. Under "User Authentication", check the "Google login" checkbox and the relevant integration options beneath it:
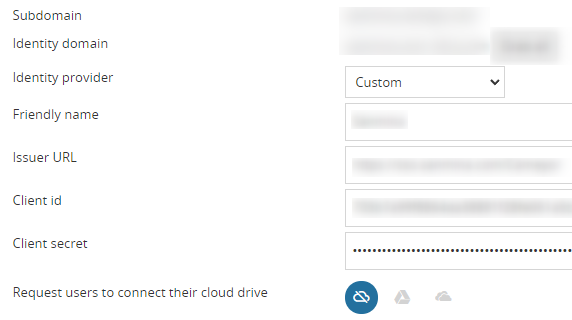
Note: if you own a Cameyo subdomain (mycompany.cameyo.com) and you check only "Google login" in this section, your users will be directly taken to the Google authentication screen when they reach your Cameyo subdomain, or they will be directly logged in, if already authenticated previously.
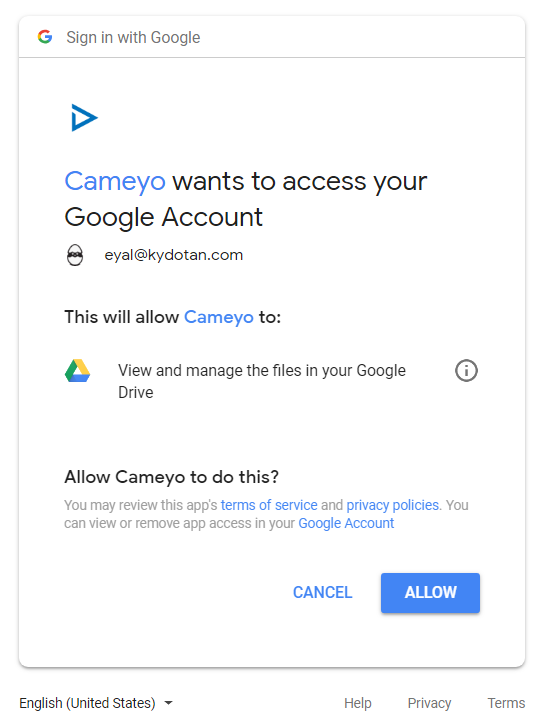
Depending on the additional permissions you check beneath the "Google login" section, your users may be requested for additional permissions. If you modify the requested permissions, users will be requested for permissions anew upon their next connection. As an example, here is what a user will see when logging-in if user's storage (GDrive) was checked in this section:
Security and multi-factor authentication: if your G Suite organization requires additional security steps such as MFA, they will be required for Cameyo users when they log in via Google authentication as well.
Google Drive
Cameyo integrates directly with Google Drive. When enabled, users will see their Google Drive's files within Cameyo sessions and will be able to work with files for both viewing and editing, either as a custom file dialog (if enabled in the File Dialogs settings), or as a path within Explorer.
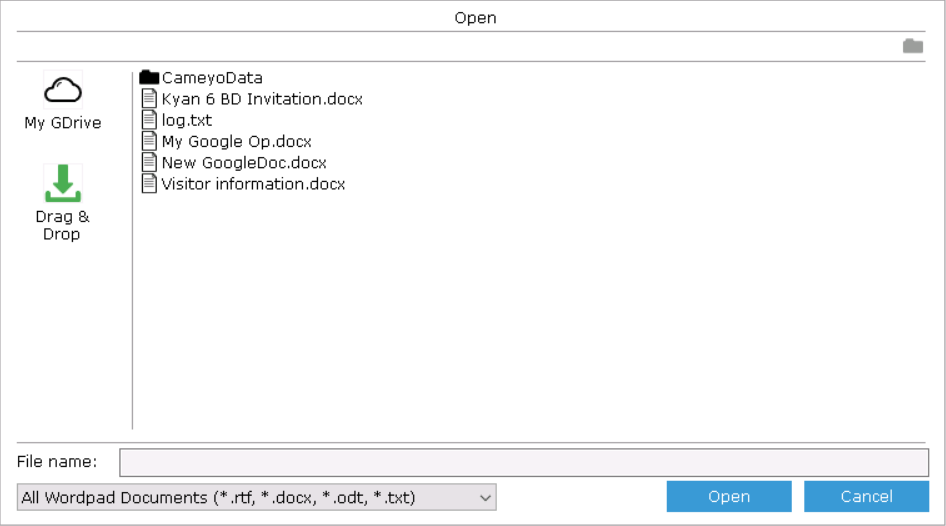
To enable Google Drive integration, check "Connect user's storage (GDrive)" checkbox in the "Google login" section (see "Authentication" above)
G Suite Directory
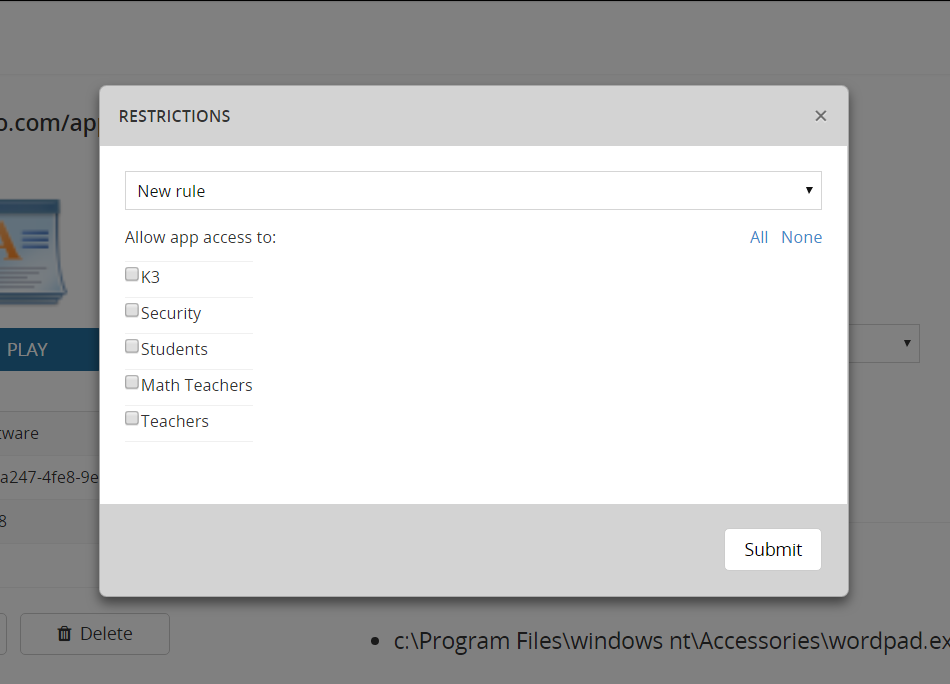
You can configure app permissions based on G Suite Directory groups:
1.Go to the URL of the app you want to set permissions for (i.e. https://online.cameyo.com/apps/401369934069).
2.Click on the link next to the "Restrictions" label ("None" if no permissions were defined yet).
3.You will see a dialog window with your G Suite user groups. Select the ones you want to authorize access for, and click "Submit".
Google Cloud Printing
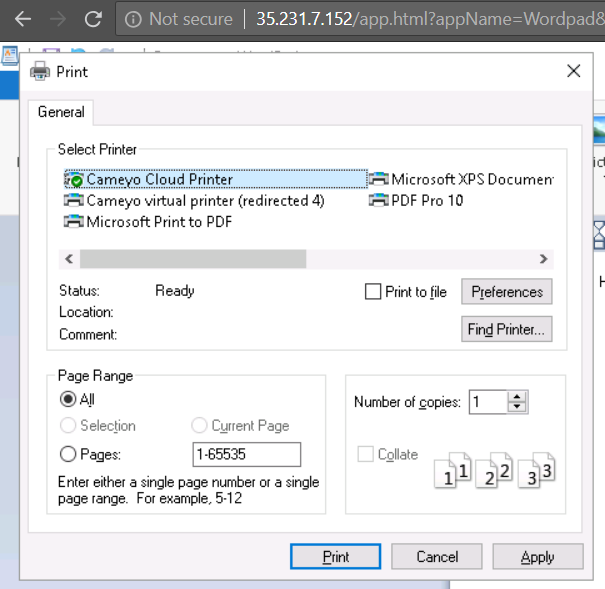
Connecting Cameyo to Google Cloud Printing will allow your users to print documents directly onto a physical printer near them. When enabled, your users will see a virtual printer named "Cameyo Cloud Printer":
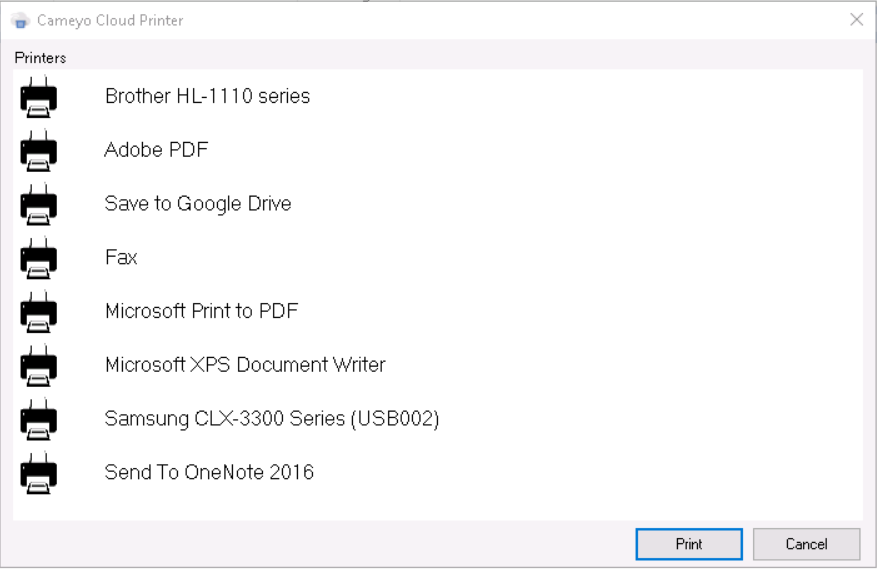
When selecting this printer, they will then see a confirmation screen asking them which cloud-linked printers they would like to print to:
To enable Google Cloud Printing integration, check "Connect user's printers (GCP)" checkbox in the "Google login" section (see "Authentication" above).